If you’re running a global WooCommerce store or want to offer your users a better browsing experience with multiple currency options, here’s a quick and effective way to add a currency switcher directly into your WordPress menu.
Step-by-Step Guide to Creating a Currency Switcher Menu
1. Create a New Menu in WordPress
From your WordPress dashboard:
- Go to Appearance > Menus
- Click on “Create a new menu”
- Give it a name like
Currency Switcherand click Create Menu
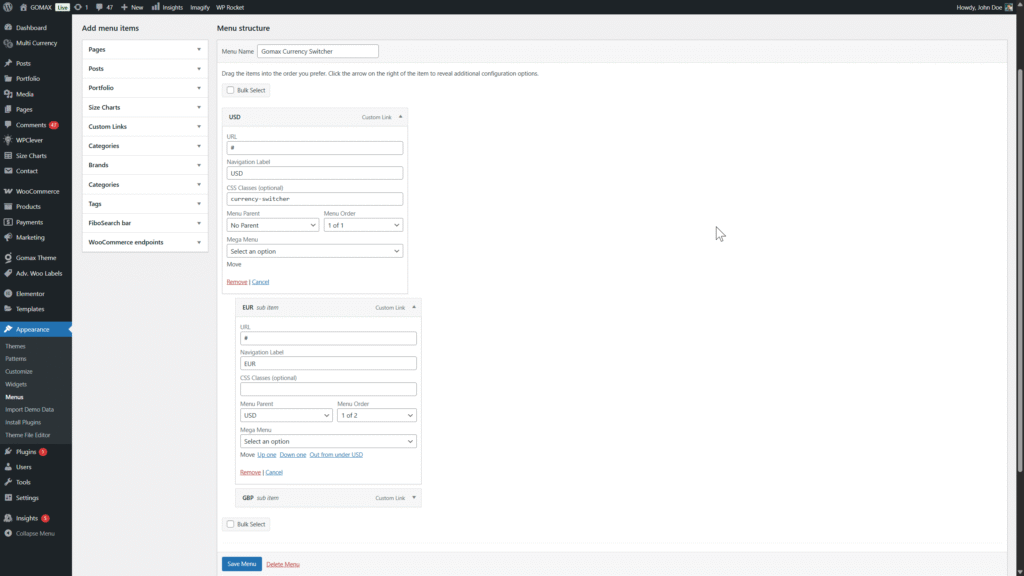
2. Add Your Default Currency as the Main Menu Item
- Click Custom Links
- In the URL field, type
# - In the Link Text (Label) field, enter your default currency, e.g.,
USD - Click the arrow to expand the item, then in CSS Classes, type: currency-switcher
Note: If you don’t see the “CSS Classes” field, click on Screen Options (top right of the page) and check the box for “CSS Classes”.
3. Add Sub-Currencies as Submenu Items
- For each additional currency (like EUR, GBP, RMB), repeat the process:
- Add a Custom Link with
#as the URL - Set the label (e.g.,
EUR,GBP,RMB) - Leave the CSS Classes field blank
- Drag these items under the main
USDitem to create a submenu structure
- Add a Custom Link with
4. Assign the Menu to a Theme Location
- Scroll to Menu Settings
- Check any available display location — for example, Menu 6 or similar
- Click Save Menu
You should now have a structure like this:
5. Link the Menu to Your Header with Elementor
- Go to Global Sections (or your theme’s header builder)
- Edit your Navbar with Elementor
- Locate the widget or control where you can assign a WordPress menu
- Select your newly created Currency Switcher Menu
Your site now has a simple and customizable currency switcher inside the navigation menu. You can extend its functionality by integrating it with a currency switching plugin or connecting the submenu clicks with custom scripts or URLs for real switching behavior.
If you’re using a Themeasy theme like GOMAX, this setup is already supported and visually integrated. Just make sure you’re on the latest version and follow the steps above.